That took care of half of the tables, but we were still struggling for what to do for shorter centerpieces on the other tables. We bought some white gazebos online, (read our Love Story page, and you'll understand why) but we could not quite figure out a way that we wanted them to look good. Well, it just so happens I was on Pinterest yesterday, as I always am, and I ran into something; a tutorial...

I saw this, and I just fell in love. I looked through the directions and thought, "hey, we could do this." I didn't think it would be too expensive, either. So, I had my mom sign onto Pinterest and check it out as well, and she loved them, too. I think we had pretty much decided we wanted to give it a try.
We had lots of shopping to do today, and at lunch we sat down to talk about it. We knew we really wanted to do this, but we had six little gazebos we did not want to go to waste either. We came up with wonderful things to do with them, and the plan to make the pomanders in our colors was underway. Of course, we knew it would be cheaper to buy everything in bulk online. We went to Hobby Lobby, and their scrapbook paper happened to be on sale, so we bought what we needed. Then we went over to Michael's to get the punch we needed and we bought one set of the corsage pins, just so we could give one a go to see if we like it.
So, here is my little tutorial for how to make one of these pomanders, though I'm sure my does not look quite as good as the one from the tutorial!
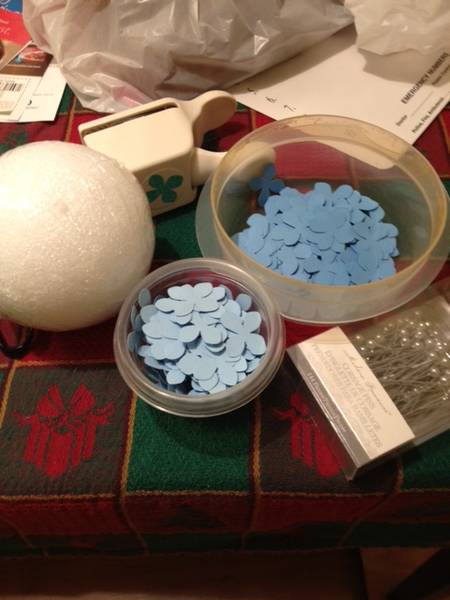
What you need:
4" styrofoam ball - You want to use white, just in case you have some small gaps between the flowers.
Martha Stewart Hydrangea punch - we got ours at Michaels. It was $9.99, but I had a 40% off coupon through the app on my phone.
Corsage pins with pearls on the ends - each one takes about 100 pins, they are cheaper to buy in bulk online.
Scrapbook paper - each ball takes about two sheets of paper. We are choosing to do ours in two different colors, but the tutorial used the same. It's all about what you like.

So, you have to first punch out all of the flowers from the scrapbook paper. You can get from about 98 to 100 different flowers from each piece of paper, and you need about 180-200 flowers for each ball. Once I was done punching them, I put them in separate containers to keep the colors apart as I went. Then, you have to curl up the ends a little bit, making them go into the center a little to give them a more full look. I did this as I went, though.

Then, you put two of the flowers together and put a pin in them. Turn them so that they're both showing and looked like a full flower. It was easiest to start by doing a row all the way around the ball like it suggested in the tutorial. Then, you just fill one half at a time. Try to fill in spots as well as you can, though it's okay if some stryofoam shows, because you really can't see it unless you look at it really close. In the end, you end up with this...

I am incredibly happy with how it turned out. I left some without flowers at the bottom so that it will stand a little bit better once we put it on something. We have decided to put three on each table; two blue like this, and one with browns. We are going to put them on top of different sized vases, and we are going to fill the vases with coffee beans to bring in the brown a little more. Overall, I am very pleased with what we have finally come up with.
Also, I've added this to a link up over at A Simply Klassic Home, so head over there to check out her great blog and other projects people are doing right now.
Wow, this is such a cute idea. And yours turned out excellent!!! Good for you doing this so ahead of the game :-)
ReplyDeleteOh my I love this!!!! Thanks for the tutorial, I am making one now! Thanks for stopping by my blog, I love meeting new friends! I hope the wedding planning is treating you well, let me know if there is anything I can help you with! :)
ReplyDeleteKbreit.blogspot.com
Great job! And I agree with the above, good for you for getting a jump on the decorations!!
ReplyDeleteThanks for linking up to Simply Klassic Sundays!